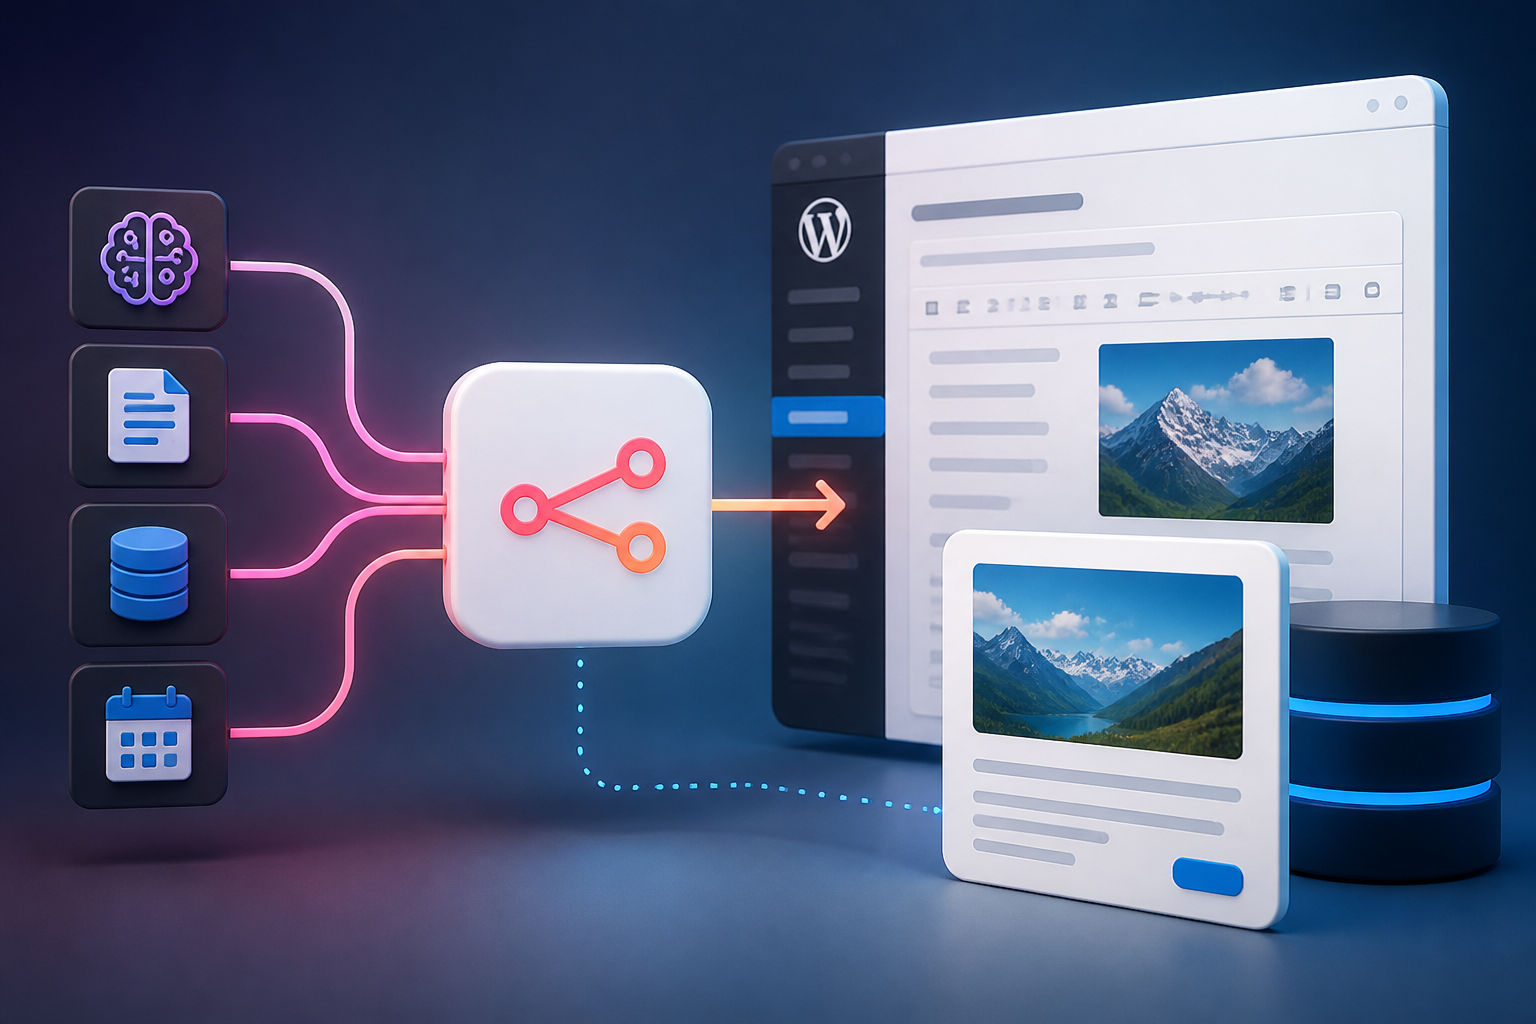
Modern content operations require resilient, programmatic integration between content generation engines, data platforms, and publishing CMS architectures. When building digital workflows, automating a n8n wordpress post pipeline unlocks scalable publishing without relying on manual entry, fragile browser automation, or costly third-party iPaaS platforms with artificial execution limits. Whether you are generating AI-assisted documentation, synchronizing multi-site networks, ingesting data from headless headless systems, or scheduling complex editorial calendars, n8n provides an enterprise-grade platform to orchestration these interactions with granular precision.
This technical guide details the complete blueprint for integrating n8n with WordPress via the core WordPress Node and advanced custom HTTP REST API calls. You will learn how to configure authentication securely, handle binary media uploads for featured images, hydrate Advanced Custom Fields (ACF) and custom post types (CPTs), execute scheduled publishing, handle real-time webhook triggers, and implement production-ready error boundaries for long-term stability.
Architectural Overview: n8n and the WordPress REST API
To construct reliable workflows, it is essential to understand how n8n communicates with WordPress under the hood. WordPress exposes its core features via a standard REST API rooted at /wp-json/wp/v2/. n8n acts as an HTTP client that dispatches authenticated JSON payloads to these endpoints to trigger operations such as post creation, tax assignment, metadata updates, and media attachments.
Why Choose n8n for WordPress Publishing Automation?
While platforms such as Zapier or Make (Integromat) offer simple integrations, n8n offers significant architectural advantages for managing WordPress posts:
- Self-Hosted Data Sovereignty: You can host n8n on your own infrastructure (Docker, Kubernetes, VM), ensuring proprietary content, internal data payloads, and credential tokens never pass through third-party servers.
- No Payload or Execution Constraints: Heavy workflows that transform thousands of long-form articles or handle high-resolution image uploads are not gated by restrictive multi-tiered execution limits or strict file size limits imposed by cloud SaaS platforms.
- Granular Code and Logic Control: The availability of native JavaScript and Python Code nodes inside n8n allows for arbitrary payload transformation, complex regex cleaning, Markdown-to-HTML compilation, and custom conditional validation prior to sending requests to WordPress.
- Native Integration with Complex Node Networks: n8n integrates directly with vector databases, large language models (LLMs), SQL databases, Webhooks, and cloud storage providers, making it ideal for feeding structured data directly into WordPress posts.
Native Node vs. HTTP Request Node: Strategic Comparison
When engineering a n8n wordpress post workflow, you must decide whether to use the built-in WordPress Node or the generic HTTP Request Node. The table below highlights the trade-offs of each approach:
| Feature Capabilities | Native n8n WordPress Node | Custom HTTP Request Node |
|---|---|---|
| Setup Complexity | Low (Form-based fields) | Medium-High (Manual JSON/Headers) |
| Basic Post Management | Fully supported (Create, Update, Get) | Fully supported via REST API |
| Custom Post Types (CPTs) | Limited or configuration-dependent | Unrestricted access to any registered endpoint |
| ACF / Meta Field Hydration | Not natively supported out of the box | Full native support via JSON payload body |
| Binary Featured Media Uploads | Basic attachment mapping | Complete control over multipart headers and binary buffers |
| Performance & Error Fine-Tuning | Standardized error handling | Custom handling for 4xx/5xx codes, custom headers, and retries |
For standard blogging workflows, the native node is fast and reliable. For advanced enterprise deployments involving custom metadata, custom tax structures, and multi-step media pipeline processing, combining native nodes with HTTP Request nodes provides the maximum level of resilience and control.
Prerequisites & Security: WordPress REST API Authentication
Before n8n can programmatically create or publish a WordPress post, you must authenticate your requests. WordPress supports several authentication paradigms, but for server-to-server workflow automation, Application Passwords are the recommended industry standard.
Configuring Application Passwords in WordPress
Introduced natively in WordPress 5.6, Application Passwords allow external services to authenticate without exposing the main user account password. These credentials can be revoked individually if a key is compromised.
- Log into your WordPress Dashboard as an Administrator (or an Editor account assigned to automation).
- Navigate to Users > Profile (or Users > All Users and edit the dedicated automation service account).
- Scroll down to the Application Passwords section.
- Enter a clear, descriptive name for the integration (e.g.,
n8n-production-publishing-node). - Click Add New Application Password.
- Copy the generated 24-character password string immediately. Note: This password will only be displayed once.
Security Best Practice: Always assign automation tasks to a dedicated service account user (e.g.,
automation_bot) with the exact minimum permissions required (Editor or Author role) rather than using a primary Administrator account. This minimizes security risks and ensures audit trails in revision logs accurately attribute automated actions.
Setting Up Credentials Inside n8n
Once you have generated the credentials, configure them in your n8n workspace:
- In n8n, open the left sidebar and navigate to Credentials.
- Click Create Credential and search for WordPress API.
- Enter your configuration details:
- URL: The full root URL of your instance, including HTTPS protocol (e.g.,
https://example.com). Do not include trailing slashes or the/wp-json/subpath. - User: The exact username of the service account assigned to the application password.
- Password: Paste the 24-character Application Password without spaces.
- URL: The full root URL of your instance, including HTTPS protocol (e.g.,
- Click Save to test and store the credential.
If you prefer to connect via HTTP Request nodes directly, you can use standard HTTP Basic Authentication by selecting Basic Auth in the node settings and using your username and Application Password as the credentials.
Working with the Native n8n WordPress Node
The native n8n WordPress node streamlines basic post management tasks by providing structured form inputs for standard WordPress schema properties. This section covers configuring the native node to perform fundamental operations.
Creating a Standard Post
To create a post using the native node, add the WordPress node to your canvas, select your configured API credential, and set the parameters as follows:
- Resource: Post
- Operation: Create
- Title: Dynamic string mapped from your upstream node (e.g.,
{{ $json.article_title }}) - Content: Formatted HTML or Markdown payload (e.g.,
{{ $json.article_html }})
Additional Fields Configuration
Click on Add Option under Additional Fields to configure additional metadata properties:
- Status: Dictates the post lifecycle state. Choose between
draft,publish,future(for scheduled posts), orpending(for editorial review). - Slug: URL-friendly permalink string (e.g.,
n8n-wordpress-post-guide). If left empty, WordPress auto-generates the slug from the title. - Excerpt: A concise summary paragraph used by themes, search indexes, and archive views.
- Author ID: Numeric user ID assigned as the post author.
- Categories: An array of numeric category term IDs (e.g.,
[2, 14]). - Tags: An array of numeric tag term IDs (e.g.,
[105, 203]).
Updating Existing Posts Dynamically
Updating posts programmatically requires capturing the internal WordPress Post ID during creation or searching for it via an upstream query node. To perform an update action:
- Set Operation to
Update. - Map the Post ID field dynamically using expressions:
{{ $json.wordpress_post_id }}. - Specify only the properties you intend to change (e.g., updating
statusfromdrafttopublishafter human sign-off). Unspecified fields remain untouched in the WordPress database.
// Example n8n Expression payload mapped inside a Code Node prior to the WordPress Node
return {
  json: {
    wordpress_post_id: 4821,
    post_title: "Updated Technical Documentation for n8n Workflows",
    post_status: "publish",
    categories: [4, 12]
  }
};
Advanced Post Automation Using the HTTP Request Node
While native nodes simplify basic operations, real-world web publishing pipelines often demand capabilities beyond standard post creation. When your workflow requires populating Advanced Custom Fields (ACF), handling non-standard metadata, targeting Custom Post Types (CPTs), or managing granular status updates, utilizing the standard HTTP Request Node directly against the WordPress REST API is the optimal technical approach.
Constructing Raw REST API Payloads
To publish or update posts via the HTTP Request node, send a POST request to https://example.com/wp-json/wp/v2/posts. The request header must include Content-Type: application/json alongside your HTTP Basic Auth header.
Full JSON Payload Schema Example
Below is a production-grade raw JSON payload demonstrating the structure required for a complex post creation request containing tags, categories, slugs, custom meta, and scheduling directives:
{
  "title": "Advanced Workflow Patterns in n8n and WordPress",
  "content": "<p>Automating digital workflows requires reliable architecture...</p><h2>Implementation Steps</h2><p>Detailed content goes here...</p>",
  "excerpt": "An in-depth guide on constructing production-grade n8n and WordPress integration pipelines.",
  "status": "publish",
  "slug": "advanced-workflow-patterns-n8n-wordpress",
  "author": 3,
  "comment_status": "closed",
  "ping_status": "closed",
  "categories": [5, 18],
  "tags": [42, 89, 112],
  "featured_media": 1254,
  "meta": {
    "_custom_seo_focus_keyword": "n8n wordpress post",
    "sidebar_layout": "no-sidebar",
    "canonical_override_url": "https://example.com/original-source"
  }
}
Integrating Advanced Custom Fields (ACF)
Advanced Custom Fields (ACF) is one of the most widely used plugins for extending WordPress metadata schemas. By default, custom ACF fields are not exposed to the standard WordPress REST API payload unless explicitly configured.
Step 1: Expose ACF Fields to REST API
When registering field groups inside the ACF admin user interface or via PHP code, ensure that the Show in REST API toggle is enabled. If registering field groups programmatically via acf_add_local_field_group(), explicitly declare:
'show_in_rest' => true,Step 2: Hydrate ACF Data via REST Payload
Depending on your site configuration (or whether you are using the official ACF to REST API plugin extension), custom fields are written using either the top-level fields property key or nested inside the standard core meta key. The standard ACF REST API wrapper format expects structured key-value pairs:
{
  "title": "Automated Product Launch Summary",
  "content": "<p>Product release documentation...</p>",
  "status": "draft",
  "fields": {
    "product_sku": "N8N-WP-AUTO-01",
    "target_release_date": "2026-06-15",
    "is_featured_product": true,
    "technical_specifications_file": 4512
  }
}
If you encounter situations where ACF properties refuse to hydrate, you can expose post meta fields directly to the standard meta array using native WordPress PHP filters in your theme’s functions.php file:
add_action('rest_api_init', function () {
    register_post_meta('post', 'custom_field_name', [
        'show_in_rest' => true,
        'single'       => true,
        'type'         => 'string',
    ]);
});
Managing Custom Post Types (CPTs)
Automated content operations frequently target non-standard post structures such as documentation items, portfolios, events, or product catalogs. To interact with Custom Post Types in n8n using HTTP Request nodes:
- Ensure the Custom Post Type definition sets
'show_in_rest' => trueduring registration viaregister_post_type(). - Locate the post type’s REST API endpoint base. By default, this is equal to the post type slug (e.g.,
/wp-json/wp/v2/docsor/wp-json/wp/v2/portfolio). If a custom REST base was defined using'rest_base' => 'knowledge-base', your target URI must match that custom path. - Direct your n8n HTTP Request node URI to the appropriate target path:
https://example.com/wp-json/wp/v2/<rest_base>/.
Programmatic Featured Image Handling & Binary Media Pipeline
Attaching a featured image to a WordPress post requires a two-stage API transaction. You cannot simply pass a raw public web URL string into the featured_media property of a post object. Instead, you must first upload the image file to the WordPress Media Library to generate a valid media attachment ID, then associate that ID with your post payload.
Architectural Sequence for Image Attachment
- Fetch Remote Media: Use an HTTP Request node (or an AI image generation node like OpenAI DALL-E) inside n8n to download the image asset into n8n’s internal binary memory space.
- Upload Attachment to Media Endpoint: Issue a binary
POSTrequest to WordPress at/wp-json/wp/v2/mediacontaining the image raw data payload alongside appropriate file header descriptions. - Extract Media ID: Capture the numeric media asset ID returned in the JSON response payload (e.g.,
response.data.id). - Inject Media ID into Post Creation Request: Map the returned numeric attachment ID directly to the
featured_mediaparameter when creating or updating the target WordPress post.
Step-by-Step Configuration in n8n
Step 1: Downloading standard image binary
Add an HTTP Request Node to download your source image file:
- Method: GET
- URL:
https://images.example.com/source-banner.jpg - Response Format: File / Binary Data
- Put Output to Binary Field:
data
Step 2: Uploading Binary Data to WordPress Media Library
Add a secondary HTTP Request node configured to send the buffered binary file directly to WordPress:
- Method: POST
- URL:
https://example.com/wp-json/wp/v2/media - Authentication: Pre-configured Basic Auth credentials
- Send Body: Toggle On
- Body Content Type: Binary Data
- Input Data Field Name:
data - Headers Setup:
Content-Disposition:attachment; filename="automated-featured-image.jpg"Content-Type:image/jpeg(must match the image MIME type)
WordPress will process the incoming binary payload, construct all intermediate image thumbnail sizes defined by your active theme, and return an explicit JSON response object containing details about the created media object:
{
  "id": 8451,
  "date": "2026-03-30T10:15:00",
  "slug": "automated-featured-image",
  "type": "attachment",
  "link": "https://example.com/automated-featured-image/",
  "title": { "raw": "automated-featured-image" },
  "author": 3,
  "media_type": "image",
  "mime_type": "image/jpeg",
  "source_url": "https://example.com/wp-content/uploads/2026/03/automated-featured-image.jpg"
}
Step 3: Attaching the Uploaded Image to the Post
In your final post creation node (HTTP Request or native WordPress node), bind the numeric media asset ID dynamically using standard n8n expression syntax:
// Dynamic mapping expression within the featured_media input parameter
{{ $json.id }}
Scheduling, Batching, and AI Content Pipeline Workflows
Enterprise publishing systems often require processing bulk content queue items, managing scheduled post rollouts, or connecting AI content transformation stages. Understanding execution mechanics ensures workflows run smoothly without overloading web servers.
Automated Post Scheduling Strategies
There are two primary architectural patterns for scheduling posts via n8n:
1. Native WordPress Post Scheduling
You can offload scheduling responsibilities directly to the WordPress core engine by setting the status property to future and supplying an ISO 8601 timestamp in the future for the date or date_gmt parameters:
{
  "title": "Scheduled Maintenance Notice",
  "content": "<p>System upgrades planned...</p>",
  "status": "future",
  "date_gmt": "2026-12-01T08:00:00"
}
Cautionary Note: Native WordPress scheduling relies on internal system cron triggers (wp-cron.php). If your site experiences low traffic volumes, scheduled posts may miss their execution windows until a web visitor triggers the script. For mission-critical scheduling, configure a real server cron job to ping wp-cron.php at fixed intervals or let n8n handle scheduling triggers directly.
2. n8n-Managed Execution Scheduling
Instead of sending future timestamps to WordPress, keep raw draft items stored in an external queue database (such as Airtable, PostgreSQL, or Redis). Use an n8n Schedule Trigger node to execute a daily or hourly poll, fetch a single item from your queue, run transformation steps, and publish the post in real-time with status: "publish".
Building an End-to-End AI Content Publishing Pipeline
Below is a production-grade blueprint for an automated AI content generation pipeline that creates, transforms, and uploads published posts directly into WordPress:
- Trigger Node (Cron/Webhook): Fires every Monday at 09:00 AM UTC or receives a inbound target topic payload via Webhook.
- Data Retrieval Node: Pulls contextual data, target keywords, or content briefs from an external database or CRM.
- LLM Generation Node (OpenAI / Anthropic Claude / Self-Hosted LLM): Constructs structured content output using a precise prompt schema that returns Markdown body copy, meta title, meta description, and tag arrays.
- Code Node (Markdown to HTML & JSON Cleanup): Executes JavaScript processing to convert LLM Markdown formatting into web-ready semantic HTML tags, strips hallucinated content, and reformats custom arrays into numeric WordPress term IDs.
- Image Generation Node (DALL-E / Midjourney / Flux): Generates a relevant banner image matching the article title and context.
- WordPress Binary Media Upload Node: Uploads the generated banner image buffer to
/wp-json/wp/v2/mediaand captures the attachment ID. - WordPress Create Post Node: Compiles the transformed HTML content body, title, tax IDs, meta fields, and image attachment ID into a single draft post payload.
- Notification Node (Slack / Microsoft Teams / Email): Dispatches an automated notification alert containing a direct link to the WordPress preview editor (e.g.,
https://example.com/?p=4821&preview=true) for human review and final approval.
Batch Processing and Concurrency Throttling
Attempting to write hundreds of long-form articles or upload bulk media libraries concurrently can overwhelm web servers, triggering database connection limits, PHP memory exhaustion errors, or server rate-limiting restrictions (e.g., HTTP 429 Too Many Requests).
To avoid server degradation, use n8n’s batch processing options:
- Loop Over Items Node: Process incoming dataset arrays iteratively, passing individual workflow payloads through downstream steps step-by-step.
- Split In Batches Node: Divide large data payload arrays into small execution chunks (e.g., batch sizes of 5 to 10 items).
- Wait Node: Introduce deliberate delay pauses (e.g., a 2 to 5-second sleep interval) between recursive iteration loops to allow web server database instances, object caches, and memory space to clear cleanly.
Bi-Directional Workflows: WordPress Webhooks to n8n
Automation logic is not limited to pushing data into WordPress. You can also construct bi-directional integrations that trigger n8n workflows whenever editorial actions occur inside WordPress (e.g., when an author publishes a new n8n wordpress post item manually).
Answering Common Questions: Social Media Distribution
A common operational query is: Can I automatically post my WordPress posts to social media channels?
Yes. By pairing a WordPress publish hook with an n8n Webhook trigger, you can construct a dynamic social broadcasting engine. The moment a user publishes a post, WordPress sends a Webhook payload to n8n, which formats the content and broadcasts it across platforms like X (formerly Twitter), LinkedIn, Telegram, Discord, and Mastodon simultaneously.
Configuring Inbound Webhooks in WordPress
To broadcast post lifecycle events to n8n, install a lightweight webhook dispatcher plugin (such as WP Webhooks or custom PHP hooks in your theme framework).
Custom PHP Webhook Implementation Example
If you prefer to avoid third-party plugins, add this custom PHP snippet to your active theme’s functions.php file or a custom site plugin to automatically dispatch webhooks to n8n upon post publication:
add_action('transition_post_status', 'trigger_n8n_post_published_webhook', 10, 3);

function trigger_n8n_post_published_webhook($new_status, $old_status, $post) {
    // Execute only when a post transitions to published status from a non-published state
    if ($new_status === 'publish' && $old_status !== 'publish' && $post->post_type === 'post') {
        $webhook_url = 'https://n8n.yourdomain.com/webhook/wordpress-post-published';

        $payload = array(
            'post_id'        => $post->ID,
            'title'          => $post->post_title,
            'permalink'      => get_permalink($post->ID),
            'excerpt'        => get_the_excerpt($post),
            'author'         => get_the_author_meta('display_name', $post->post_author),
            'featured_image' => get_the_post_thumbnail_url($post->ID, 'full'),
            'published_at'   => $post->post_date_gmt
        );

        wp_remote_post($webhook_url, array(
            'method'      => 'POST',
            'timeout'     => 15,
            'redirection' => 5,
            'httpversion' => '1.1',
            'blocking'    => false, // Non-blocking request prevents editing delays in WordPress dashboard
            'headers'     => array('Content-Type' => 'application/json; charset=utf-8'),
            'body'        => json_encode($payload),
            'data_format' => 'body',
        ));
    }
}
Downstream Workflow Construction inside n8n
Once your custom hook or plugin sends data to n8n, configure your n8n canvas layout as follows:
- Webhook Trigger Node: Set to Listen for
POSTrequests on path/wordpress-post-published. Copy the generated Webhook URL directly into your WordPress snippet configuration. - Edit Fields (Set) Node: Format the incoming webhook string variables into ideal char-length strings optimized for social platform networks.
- Branching / Router Node: Direct the payload to platform-specific broadcast nodes simultaneously:
- LinkedIn Node: Formats title, summary text, and permalink into an organization update post.
- X / Twitter Node: Formats a thread or single summary tweet containing relevant hashtags and short links.
- Telegram / Discord Nodes: Dispatches rich media embed cards featuring thumbnail images and direct editorial summary links to internal community channels.
Error Handling, Logging, and Production Security
Deploying automated content pipelines in mission-critical environments requires robust fault tolerance and defensive programming strategies. An unexpected API timeout, bad database query, or server authentication failure should fail gracefully without corrupting data state or silently failing without alerts.
Building Error Boundaries in n8n
To build failure handling into your WordPress workflows:
- Continue On Fail Setting: On individual HTTP nodes connecting to WordPress, navigate to Settings > On Error and choose
Continue (using error output). This allows the workflow to execute alternative branch logic if an upload or publishing node returns a failure code. - Global Error Trigger Workflow: Create a dedicated centralized monitoring workflow in n8n triggered by an Error Trigger Node. Whenever any publishing workflow fails anywhere across your system instance, the Error Trigger catches the failure execution payload, extracting workflow names, timestamps, error stack traces, and triggering a high-priority alert on your engineering escalation desk (e.g., PagerDuty, Slack, OpsGenie).
Handling HTTP Retry Cycles and Exponential Backoff
Network instability or brief API outages can lead to transient HTTP status errors (such as 502 Bad Gateway or 503 Service Unavailable). Enable automatic retries within your n8n nodes:
- Retry on Fail: Toggle on inside the HTTP Request settings tab.
- Max Tries: Set to
3or5attempt loops. - Wait Between Tries (ms): Set to
5000milliseconds (5 seconds) with exponential backoff enabled. This gives the target WordPress server infrastructure brief recovery windows to complete pending operational tasks.
Security Hardening Checklist for Production Automation
When connecting external automation platforms like n8n directly to your live production website database, enforce the following core security controls:
- HTTPS Everywhere: Ensure all web communication traffic occurs exclusively over encrypted TLS connections. Reject insecure
http://endpoint configurations completely. - IP Whitelisting: If your self-hosted n8n deployment utilizes a static public IP address, restrict incoming administrative traffic to the WordPress REST API path (
/wp-json/) using Cloudflare Page Rules or Nginx firewall configurations to block access from unauthorized origin addresses. - Payload HTML Sanitization: Before passing raw strings into WordPress post fields programmatically, filter out malicious script tags, arbitrary HTML block injections, and execution script risks using dynamic validation steps within Code Nodes.
- Database Cleanup Maintenance: Running thousands of automated update requests can quickly create massive volumes of post revision rows in your WordPress database tables. Configure database retention limits in
wp-config.phpto prune historical revisions periodically:
// Limit maximum post revisions retained in database per post entry
define('WP_POST_REVISIONS', 5);
Troubleshooting Common Integration Failure Modes
Despite thorough setup procedures, integrating external platforms via web APIs can present unexpected technical issues. The following reference section outlines root causes and fixes for common HTTP REST API status errors.
1. 401 Unauthorized Error
Symptom: The n8n node returns 401 Unauthorized: Sorry, you are not allowed to create posts as this user.
Root Cause:
- Incorrect credentials entered in the Application Password field.
- The WordPress user account assigned to the credentials lacks sufficient capabilities (e.g., a
SubscriberorContributoruser attempting to create published posts directly). - Apache or Nginx web server rules strip HTTP Basic Authorization headers before passing incoming requests to PHP execution engines.
Resolution: Ensure the user account role is set to at least Editor or Author. If server environment headers strip parameters, add the following configuration lines to your root .htaccess file:
# Preserve HTTP Authorization Headers for WordPress REST API
SetEnvIf Authorization "(.*)" HTTP_AUTHORIZATION=$1
RewriteEngine On
RewriteCond %{HTTP:Authorization} ^(.*)
RewriteRule ^(.*)$ - [E=HTTP_AUTHORIZATION:%1]
2. 400 Bad Request Error
Symptom: 400 Bad Request: Invalid parameter(s): categories or JSON parsing exceptions.
Root Cause: Passing malformed payload data types to WordPress REST API array properties (e.g., attempting to pass an array of term strings like ["Technology", "Guides"] instead of an array of numeric term IDs like [12, 45]).
Resolution: Add an upstream Code Node in n8n to map incoming string terms to their corresponding numeric term IDs prior to dispatching your request payload to WordPress.
// Mapping tag string lists to validated numeric term array structures
const categoryMap = {
  "Technology": 12,
  "Automation": 45,
  "Guides": 88
};

const rawCategories = $json.incoming_categories; // Array of strings e.g. ["Automation", "Guides"]
const numericCategoryIds = rawCategories.map(name => categoryMap[name]).filter(Boolean);

return {
  json: {
    ...$json,
    formatted_category_ids: numericCategoryIds
  }
};
3. 413 Payload Too Large
Symptom: Binary featured image uploads fail when issuing POST requests to /wp-json/wp/v2/media.
Root Cause: The incoming binary media file exceeds the upload limit set in PHP environment variables (upload_max_filesize or post_max_size) or web server execution policies.
Resolution: Increase resource allocation boundaries inside your server host’s php.ini configuration file:
upload_max_filesize = 64M
post_max_size = 64M
memory_limit = 256M
max_execution_time = 300
4. Stale Content or Caching Headers Issue
Symptom: Updates applied by n8n execute successfully with a 200 OK code, but changes are not visible to site visitors immediately.
Root Cause: Server-side page caching plugins (such as WP Rocket, LiteSpeed Cache, or W3 Total Cache) or edge CDN infrastructure (like Cloudflare) are serving cached HTML pages instead of fetching updated post data.
Resolution: Add a secondary HTTP Request node to your workflow after a post creation or update step that calls your plugin’s cache-clearing URL or triggers Cloudflare’s Purge Cache API endpoint for that exact post URL.
Frequently Asked Questions
How do I update custom post metadata or ACF fields using the native n8n WordPress node?
The native n8n WordPress node primarily handles standard post fields (title, content, tags, categories). To update custom meta or Advanced Custom Fields (ACF) reliably, use the generic n8n HTTP Request node to send a custom POST request directly to the /wp-json/wp/v2/posts/<id> endpoint containing your meta properties formatted inside a raw JSON body payload.
What is the most secure way to authenticate n8n with WordPress?
Application Passwords are the most secure standard method for authenticating server-to-server workflows. They allow you to generate restricted credential keys assigned to dedicated service accounts without exposing primary administrative user passwords. Keys can be easily revoked from the WordPress admin interface if compromised.
Can n8n upload and assign featured images to WordPress posts automatically?
Yes. This is achieved using a two-step HTTP node pattern: First, send an HTTP request containing your image binary data to the WordPress media endpoint (/wp-json/wp/v2/media). Next, extract the numeric media attachment ID returned in the JSON response and map it to the featured_media property field in your post creation request node.
How can I prevent n8n from overloading my WordPress server during bulk publishing runs?
To avoid high server loads, use n8n’s Split In Batches and Wait nodes to process items iteratively. Throttling your execution loops to small batch sizes (e.g., 5 to 10 posts) with a 2 to 5-second sleep interval between requests helps keep web server CPU usage, memory consumption, and database connection pools within safe operational limits.
What should I do if my WordPress REST API requests return a 401 Unauthorized status?
First, verify that your username and Application Password are correct and that the user account has sufficient permissions (Editor or Author role). If the credentials are valid, check whether your Apache or Nginx web server configuration is stripping authorization headers before passing requests to PHP. Adding custom rewrite rules to your .htaccess or Nginx setup preserves the required HTTP_AUTHORIZATION header parameter.
Summary & Strategic Action Plan
Integrating n8n with WordPress provides a powerful, private, and scalable platform for building custom automated publishing systems. By leveraging the REST API, you can move past manual content entry and simple RSS feeds to create rich content workflows that sync dynamic metadata, format structured multi-media layouts, and scale efficiently.
Implementation Roadmap
- Set Up Service Account Credentials: Create a dedicated, restricted user profile inside WordPress and generate a dedicated Application Password key.
- Verify Basic API Connectivity: Use the native n8n WordPress node to test fetching site metadata and issuing draft creation requests.
- Standardize Media Attachment Handling: Implement a robust two-step binary upload pipeline using HTTP Request nodes to generate image media attachments dynamically before creating posts.
- Extend Payloads for Custom Data: Target custom REST API endpoints using raw JSON payloads to manage Advanced Custom Fields (ACF) and Custom Post Types (CPTs) accurately.
- Build Error Isolation Boundaries: Set up global error monitoring triggers, retry rules, and exponential backoff schedules inside n8n to handle unexpected web server outages gracefully.
- Implement Real-Time Distribution Webhooks: Configure inbound transition hooks in WordPress to instantly trigger cross-platform social media distribution workflows when articles are published.
By following this blueprint, your organization can build a secure, production-grade automation infrastructure that saves hours of manual content management while scaling your site’s publishing capabilities.
